Kirk Park, Christmas Eve 2013

By Christmas Eve the ice had stopped falling and we had an inch or so of snow taking the edge off. This made it fairly easy to drive out to Kirk Park in time to catch the sunset over Lake Michigan. I have the entire set available for viewing on Flickr.

[[{“type”:”media”,”view_mode”:”media_original”,”fid”:”1071″,”attributes”:{“alt”:””,”class”:”media-image”,”height”:”480″,”typeof”:”foaf:Image”,”width”:”640″}}]]

The dune path leading to the water was covered by a shell of ice at least two inches thick. This was not obvious until I stepped on it and slid, feet out front like on a toboggan, to the bottom of the dune. Anyone on an actual sled probably could have easily made it to the waterline.

[[{“type”:”media”,”view_mode”:”media_original”,”fid”:”1076″,”attributes”:{“alt”:””,”class”:”media-image”,”height”:”480″,”typeof”:”foaf:Image”,”width”:”640″}}]]

The clouds came in from the west in two distinct layers; the higher ones which flowed to the horizon, and the lower ones which formed over the water and dropped lake-effect snow farther inland.

[[{“type”:”media”,”view_mode”:”media_original”,”fid”:”1081″,”attributes”:{“alt”:””,”class”:”media-image”,”height”:”480″,”typeof”:”foaf:Image”,”width”:”640″}}]]

On the beach the ice made for treacherous footing. Out in the water I could see some small chunks of ice floating and growing, and tiny ice crystals forming where the cold air pulled the heat from the water.

[[{“type”:”media”,”view_mode”:”media_original”,”fid”:”1091″,”attributes”:{“alt”:””,”class”:”media-image”,”height”:”480″,”typeof”:”foaf:Image”,”width”:”640″}}]]

On the shoreline the beginning of what would become huge piles of ice began to form.

[[{“type”:”media”,”view_mode”:”media_original”,”fid”:”1101″,”attributes”:{“alt”:””,”class”:”media-image”,”height”:”480″,”typeof”:”foaf:Image”,”width”:”640″}}]]

As they day wound down the sun came through at an oblique angle and created spots of brilliant color in an otherwise muted landscape.

A Walk Around Pickerel Lake

The sky north of Grand Rapids looked blue, so I spent the late morning and noon hours wandering around Pickerel Lake. If you haven’t been, I recommend it highly. Pickerel Lake Park and Fred Meijer Nature Preserve is near the Cannonsburg Ski Area in the northeast part of Kent County.

I arrived at the park around 10:00; mine was the only car in the lot, and as far as I could tell, the first visitor of the day. There was some cloud cover, but it was thin, with the occasional shaft of light wandering across the lake. Everything was bright and shiny, but not blindingly so. And it was quiet. Barely any wind, and few cars to disturb the calm.

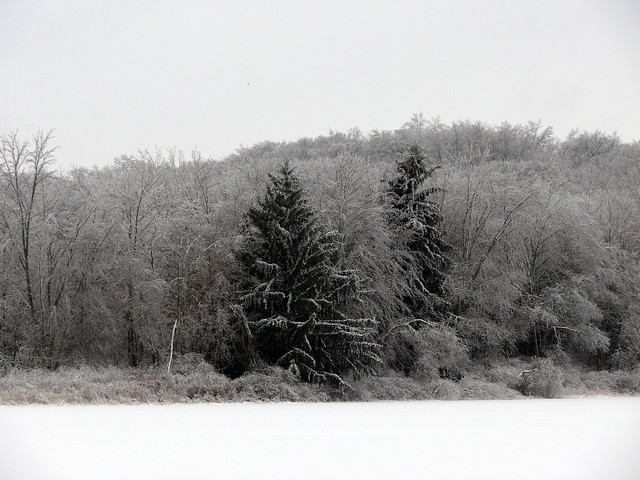
Pine trees along the northwest shore
From the boardwalk the ice was so bright against the trees on the north shore that the pines looked black.

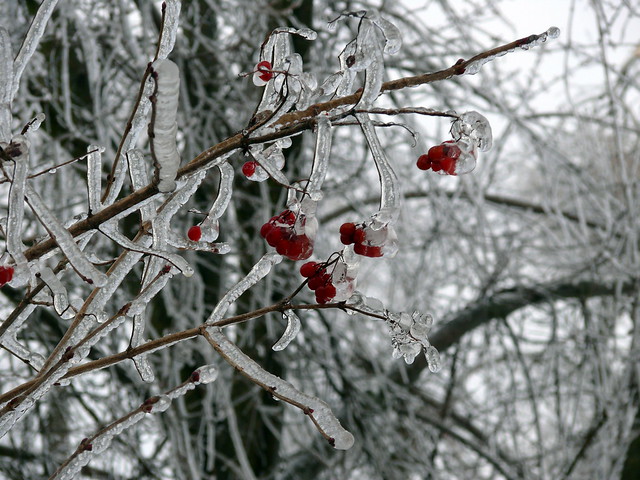
Berries in ice
The only color to be had was that of the berries frozen to their branches and protected from the animals.

More ice
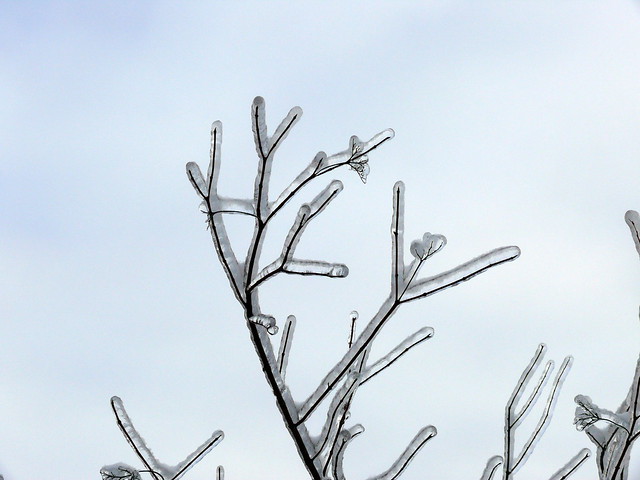
Many of the branches had ice coats so thick that the actual wood parts looked like imperfections in otherwise flawless crystal sculpture.

Looking southwest
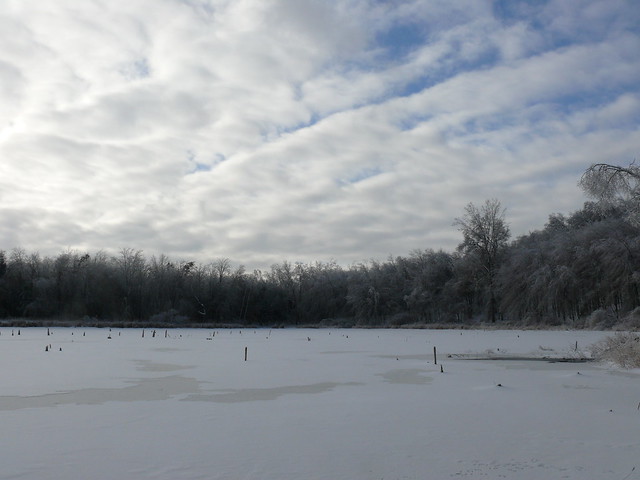
The lake itself was perfectly smooth; the only details the remnants of dead trees and places where the wind had swept the ice clean of snow.

Southeast shore
About halfway around the lake the sun came out and turned the entire south shore to diamond.

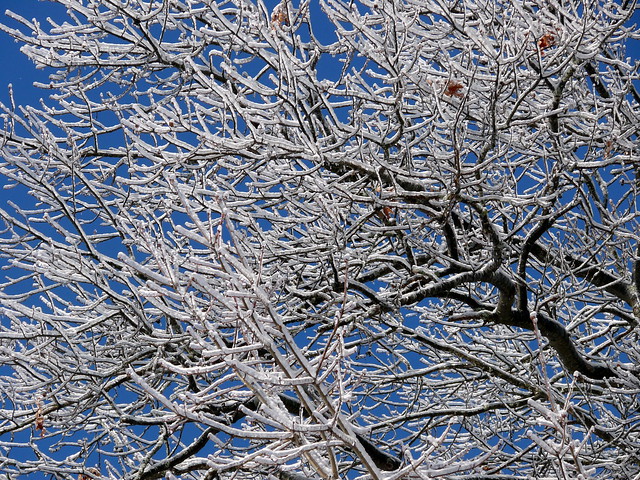
Branches and ice
In among the trees the sun began melting and cracking the ice in the trees, and it sounded like wind chimes and electricity.

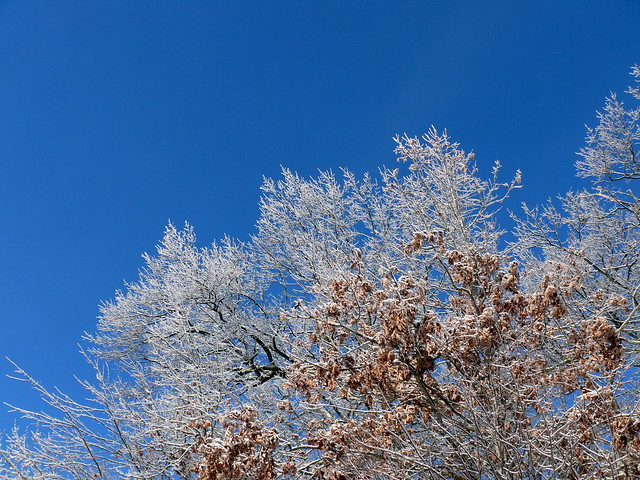
Ice and leaves
Instead of darkening the sky, the ice contrast made it the most brilliant blue imaginable.

See the entire set here on Flickr.

Solving Display Refresh/Redraw/Repaint Issues in Webkit Browsers

So debugging on a phone is nowhere near as easy as debugging on a web application, if only because you can’t use the Chrome developer tools or Firebug effectively on a three-inch screen. Fortunately (for Android developers) there is a tool called the Dalvik Debug Monitor, which comes packaged with the Android SDK. It listens to any logs coming from the phone, assuming the phone on which you are testing an app is plugged into your computer via USB cable. Works pretty well, once you get the quirks sorted out.

Anyway: on the recently completed project I came across a bug where, when updating the text content of an element on the screen, the interface refused to update until another event fired in a nearby (DOM-wise) element. Debugging was a pain, because all of the traces I had running told me that yes, all of my Javascript functions had fired, and yes, the content of the element was correct. But the screen itself still showed the old content.

Turns out, this is a Known Issue for Webkit browsers (Chrome, Safari). Sometimes, when updating an inline element or style, the browser does not redraw/repaint the screen until a block-level change happens in the DOM. This bug  most often occurs when there is a lot going on in the page, and the browser seems to assume that, if the change is not happening at the block (which is to say, layout), level, then it is less important.

Fortunately, solving the issue is MUCH easier than diagnosing it. A simple, quick update to the offending element (or its parent) will force the browser to repaint the screen. Here are a few different ways to accomplish this:

/*	Silently append and remove a text node	
	This is the fix that worked for me in the Phonegap/Android application
	the setTimeout allows a 'tick' to happen in the browser refresh,
	giving the UI time to update
*/
var n = document.createTextNode(' ');
$('#myElement').append(n);
setTimeout(function(){n.parentNode.removeChild(n)}, 0);


/*	Hide and reshow the element	*/
document.getElementById('myElement').style.display='none';
document.getElementById('myElement').offsetHeight; // no need to store this anywhere, the reference is enough
document.getElementById('myElement').style.display='block';


/*	The same thing using jQuery	*/
$('#myElement').hide();
$('#myElement').get(0).offsetHeight; // no need to store this anywhere, the reference is enough
$('#myElement').show();


/*	Set the scale of the element to 1. 
	This doesn't actually change anything visually, 
	because by default everything in the browser 
	is set to scale 1	*/

document.getElementById('myElement').style.webkitTransform = 'scale(1)';

The first one is the one I used. I was using jQuery so this simplified things just a bit. All of the other fixes are valid, but the one I used was the only one that actually worked for me in the PhoneGap application.

For further reference, here are the resources I used while tracking down and solving the bug:

Time Keeps On

Over four months after my last entry here, I find time for another one.

Life got busy for me right at the beginning of May. Master Lee went on vacation, visiting his students in Vietnam and Australia, so class suddenly became much busier. This continued right up through Memorial Day and into the Festival of the Arts performance. I turned 43 on June 5, and took the next week off from work. Spent a few days exploring Traverse City, then suddenly started a new relationship with a beautiful, amazing woman. This led directly to me being involved in a summer solstice celebration, where I collaborate with some people to project Flash visuals (fire, water, evolving plants, snowflakes) on the side of a barn and silo. Right after that, a big project kicked off at work, and that has kept me pretty busy since then.

The work has been interesting. It is a PhoneGap project, using a lot of HTML5/CSS3/jQuery and associated technologies. We used an in-house MVC platform, which was a first for me (using MVC, that is), so I had to negotiate quite a learning curve. Also learned a tremendous amount about jQuery Deferreds, hardware-accelerated CSS animations, custom event listeners, and how the MVC stack keeps disparate parts of an app in synch. I discovered how frustrating it can be to debug mobile applications. The Dalvik Debug Monitor, as good as it is generally, does tend to crash with irritating frequency. Fortunately, 90% of debugging can be done in a desktop browser. But holy cow, can that last 10% be frustrating.

Okay; enough of this for now. When I have time I will post a list of the specific issues I came across, and how I solved them.

Kohonen Map in Actionscript 3

Kohonen Map in Actionscript 3

This image is the output of a Kohonen Map, also called a self-organizing map, which is a type of simple neural network, mostly used for sorting and grouping large data sets. I am fairly happy with the results.

This is something I have wanted to do for about four years, starting with a project I worked on back in 2008. Click the image to launch the app. Once launched, click “PLAY/PAUSE” to begin; click “RESET” to restart the sorting process, and change the value in the “grid size” input field to change the dimensions of the color grid. Be careful; anything above 100 (e.g., 10,000 squares) will begin to run slowly.

To create the app, I started with Processing source code I found at jjguy.com. Translating the code to Actionscript 3 took about four hours, and another four to tweak and test and modify to accommodate Flash-specific functionality. All in all, it was surprisingly easy.

The code follows. There are three parts; Main.as, which is contains the UI, global variables, and initialization code; SOM.as, which is the code for the map, and Node.as, which contains the code for the individual blocks of color.

All of the source code, including compiled .swf, can be downloaded here.


Main.as

package {
    import flash.display.Sprite;
	import flash.display.StageAlign;
	import flash.display.StageScaleMode;
    import flash.events.Event;
	import flash.events.MouseEvent;
	import flash.events.TimerEvent;
	import flash.text.TextField;
	import flash.text.TextFieldType;
	import flash.text.TextFormat;
	import flash.utils.Timer;
    [SWF(width=720,height=480,frameRate=32,backgroundColor=0x000000)]
    public class Main extends Sprite {
		[Embed(
			source='C:/WINDOWS/Fonts/ARIAL.TTF', 
			fontName='ArialEmbed', 
			unicodeRange='U+0020-U+002F,U+0030-U+0039,U+003A-U+0040,U+0041-U+005A,U+005B-U+0060,U+0061-U+007A,U+007B-U+007E', 
			mimeType="application/x-font-truetype", embedAsCFF="false"
		)]
		private static var _arialEmbed:Class;
		
		internal var _timer:Timer;

		private var isPlaying:Boolean = false;
		
		private var btnPlayPause:Sprite;
		private var btnReset:Sprite;
		private var txtIterations:TextField;
		private var txtGridSize:TextField;
		private var colorTextBG:int = 0xcccccc;
		private var btnTextFormat:TextFormat = new TextFormat("ArialEmbed",12,0x333333,null,null,null,null,null,"center");
		private var labelTextFormat:TextFormat = new TextFormat("ArialEmbed",12,0xededed,null,null,null,null,null,"right");
		private var inputTextFormat:TextFormat = new TextFormat("ArialEmbed",12,0x000000,null,null,null,null,null,"left");

		private var som:SOM;
		private var iter:int;
		private var maxIters:int = 4000;
		public var screenW:int=480;
		public var screenH:int=480;
		private var gridSize:int = 40;

		private var rgb:Array = [
			[1,1,1],
			[0,0,0],
			[1,0,1],
			[1,0,0],
			[0,1,0],
			[0,0,1],
			[1,1,0],
			[0,1,1],
			[1,.4,.4],
			[.25,.25,.25]
		];
		
        public function Main():void {
            addEventListener(Event.ADDED_TO_STAGE,onAddedToStage);
        }
        private function onAddedToStage(e:Event):void {
            removeEventListener(Event.ADDED_TO_STAGE,onAddedToStage);
			stage.scaleMode = StageScaleMode.NO_SCALE;
			stage.align = StageAlign.TOP_LEFT;
            init();
        }
        private function init():void {
			_timer = new Timer(10);
			_timer.addEventListener(TimerEvent.TIMER,onTimer);
			initInterface();
			initMap();
			_timer.start();
        }
		
		/*	create and populate the UI elements	*/
		private function initInterface():void {
			var txtIterationsLabel:TextField = getTextField("Iterations",10,160,80,20,labelTextFormat);
			addChild(txtIterationsLabel);
			
			txtIterations = getTextField("0",100,160,50,20,labelTextFormat);
			txtIterations.selectable = false;
			addChild(txtIterations);
			
			var txtGridSizeLabel:TextField = getTextField("GRID SIZE",10,200,80,20,labelTextFormat);
			addChild(txtGridSizeLabel);
			
			txtGridSize = getTextField(gridSize.toString(),100,200,80,20,inputTextFormat);
			txtGridSize.background = true;
			txtGridSize.backgroundColor = 0xffffff;
			txtGridSize.border = true;
			txtGridSize.borderColor=0xcccccc;
			txtGridSize.type = TextFieldType.INPUT;
			txtGridSize.restrict = "0-9";
			addChild(txtGridSize);
			
			var playPauseButton:Sprite = getTextButton("PLAY/PAUSE",20,300,80,20);
			playPauseButton.addEventListener(MouseEvent.CLICK,function(e:Event):void {
				isPlaying = !isPlaying;
			});
			addChild(playPauseButton);
			
			var resetButton:Sprite = getTextButton("RESET",120,300,80,20);
			resetButton.addEventListener(MouseEvent.CLICK,function(e:Event):void {
				iter=1;
				gridSize = parseInt(txtGridSize.text);
				maxIters = gridSize*100;
				som.init(maxIters,gridSize,gridSize);
				updateMap();
			});
			addChild(resetButton);
		
		}
		
		/*	create and initialize an instance of the map 	*/
		private function initMap():void {
			som = new SOM(gridSize,gridSize, 3,screenW,screenH);
			som.x = 240;
			som.y = 0;
			addChild(som);
			iter = 1;	
			som.init(maxIters,gridSize,gridSize);
			updateMap();
		}
		
		/*	called on every tick of the timer	*/
		private function onTimer(e:TimerEvent):void {
			if(isPlaying) updateMap();
			e.updateAfterEvent();
		}
		
		/*	tell the map to make another iterations through the data, then render it to the screen	*/
		private function updateMap():void {
			var t:int = Math.floor(Math.random()*rgb.length);
			if (iter < maxIters){
				som.train(iter, rgb[t]);
				som.render();
				txtIterations.text = iter.toString();
				iter++;
			}
		}
		
		/*	functions for building interface elements	*/
		private function getTextField(txt:String,x:int,y:int,w:int,h:int,format:TextFormat):TextField {
			var tf:TextField = new TextField();
			tf.x = x;
			tf.y = y;
			tf.width = w;
			tf.height = h;
			tf.embedFonts = true;
			tf.text = txt;
			tf.setTextFormat(format);
			tf.defaultTextFormat = format;
			return tf;
		}
		private function getTextButton(txt:String,x:int,y:int,w:int,h:int):Sprite {
			var s:Sprite = new Sprite();
			s.x = x;
			s.y = y;
			s.graphics.lineStyle(1,0x808080,1,true);
			s.graphics.beginFill(colorTextBG,1);
			s.graphics.drawRect(0,0,w,h);
			s.graphics.endFill();
			s.buttonMode=true;
			s.mouseChildren = false;
			s.useHandCursor=true;
			var t:TextField = new TextField();
			t.width=w;
			t.height=h;
			t.selectable = false;
			t.embedFonts = true;
			t.text = txt;
			t.setTextFormat(btnTextFormat);
			t.defaultTextFormat = btnTextFormat;
			t.wordWrap = false;
			t.multiline=false;
			s.addChild(t);
			return s;
		}
    }
}


SOM.as

package {
	import flash.display.Bitmap;
	import flash.display.BitmapData;
	import flash.display.Sprite;
	import flash.geom.Point;
	import flash.geom.Rectangle;
	public class SOM extends Sprite {
		public var mapWidth:int;
		public var mapHeight:int;
		public var nodes:Array;
		public var radius:Number;
		public var timeConstant:Number;
		public var learnRate:Number = 0.05;
		public var inputDimension:int;
		private var pixPerNodeW:Number;
		private var pixPerNodeH:Number;
		
		private var canvasWidth:int;
		private var canvasHeight:int;
		private var canvasData:BitmapData;
		private var canvas:Bitmap;
		
		public var learnDecay:Number;
		public var radiusDecay:Number;
		
		/*	constructor	*/
		public function SOM(w:int,h:int,n:int,mapW:int,mapH:int):void {
			mapWidth = w;
			mapHeight = h;
			radius = (h + w) / 2;
			inputDimension = n;
			canvasWidth = mapW;
			canvasHeight = mapH;
			canvasData = new BitmapData(canvasWidth,canvasHeight,false,0x000000);
			canvas = new Bitmap(canvasData);
			addChild(canvas);
			
		}
		/*	initialize the map	*/
		public function init(iterations:int,w:int,h:int):void {
			mapWidth = w;
			mapHeight = h;
			radius = (h + w) / 2;
			pixPerNodeW = canvasWidth/mapWidth;
			pixPerNodeH = canvasHeight/mapHeight;
			nodes = [];
			for(var i:int = 0; i < mapHeight; i++){
				nodes[i] = [];
				for(var j:int = 0; j < mapWidth; j++) {
					nodes[i][j] = new Node(inputDimension, mapHeight, mapWidth);
					nodes[i][j].x = i;
					nodes[i][j].y = j;
				}//for j
			}//for i
			timeConstant = iterations/Math.log(radius);
			learnDecay = learnRate;
			radiusDecay = (mapWidth + mapHeight) / 2;
		}
		/*	iterate through and update the weights of each node	*/
		public function train(i:int,w:Array):void {  
			radiusDecay = radius*Math.exp(-(i/timeConstant));
			learnDecay = learnRate*Math.exp(-(i/timeConstant));
			//get best matching unit
			var ndxComposite:int = bestMatch(w);
			var x:int = ndxComposite >> 16;
			var y:int = ndxComposite & 0x0000FFFF;
			//scale best match and neighbors...
			for(var a:int = 0; a < mapHeight; a++) {
				for(var b:int = 0; b < mapWidth; b++) {
					var d:Number = dist(nodes[x][y].x, nodes[x][y].y, nodes[a][b].x, nodes[a][b].y);
					var influence:Number = Math.exp((-1 * Math.pow(d,2)) / (2*radiusDecay*i));
					if (d < radiusDecay) {      
						for(var k:int = 0; k < inputDimension; k++) {
							nodes[a][b].w[k] += influence * learnDecay * (w[k] - nodes[a][b].w[k]);
						}//for k
					}	//if d
				} //for j
			} // for i
		} // train()
		
		
		/*	functions used by training method, for calculating node weights and distances	*/
		public function dist(x1:Number,y1:Number,x2:Number,y2:Number):Number {
			return Math.sqrt( Math.pow(x2 - x1,2) + Math.pow(y2 - y1,2) );
		}
		public function distance(node1:Node, node2:Node):Number {
			return Math.sqrt( Math.pow(node2.x - node1.x,2) + Math.pow(node2.y - node1.y,2) );	
		}
		public function bestMatch(w:Array):int {
			var minDist:Number = Math.sqrt(inputDimension);
			var minIndex:int = 0;
			for (var i:int = 0; i < mapHeight; i++) {
				for (var j:int = 0; j < mapWidth; j++) {
				var tmp:Number = weight_distance(nodes[i][j].w, w);
					if (tmp < minDist) {
						minDist = tmp;
						minIndex = (i << 16) + j;
					}  //if
				} //for j
			} //for i
			return minIndex;
		}
		public function weight_distance(x:Array, y:Array):Number {
			if (x.length != y.length) {
				//	trace("Error in SOM::distance(): array lengths don't match");
			}
			var tmp:Number = 0.0;
			for(var i:int = 0; i < x.length; i++) {
				tmp += Math.pow( (x[i] - y[i]),2);
			}
			tmp = Math.sqrt(tmp);
			return tmp;
		}
		
		/*	render node information to the screen	*/
		public function render():void {
			for(var i:int = 0; i < mapWidth; i++) {
				for(var j:int = 0; j < mapHeight; j++) {
					var r:Number = (nodes[i][j].w[0]*255);
					var g:Number = (nodes[i][j].w[1]*255);
					var b:Number = (nodes[i][j].w[2]*255);
					var c:Number = r << 16 ^ g << 8 ^ b;
					canvasData.fillRect(new Rectangle(i*pixPerNodeW, j*pixPerNodeH, pixPerNodeW, pixPerNodeH),c);
				} // for j
			} // for i
		} // render()
	}
}


Node.as

package {
	public class Node {
		public var x:int;
		public var y:int;
		public var weightCount:int;
		public var w:Array;
		public function Node(n:int,X:int,Y:int):void {
			x = X;
			y = Y;
			weightCount = n;
			w = [];
			for(var i:int = 0;i<weightCount;i++) {
				w.push(Math.random()*.5+.25);
			}
		}
	}
}
 

Styling Raphael.js Elements With CSS

Recently finished up a project in which one of the major requirements was that everything be re-skinnable. This meant that every interface element needed to be styled through the style sheet. Swap out a single file to completely change the look of the site.

In theory, this shouldn’t be a problem; that is the raison d’etre for Cascading Style Sheets. Where things got  little complicated, however, was in the many, many charts created using Raphael.js. Even the colors used therein needed to be accessible from the .css files.

Raphael produces SVG elements, which are added dynamically to the DOM. I found that the easiest way to style them was to, at the point of creating the individual elements, use Javascript (jQuery, in this case) to add class names. And that simply, everything works! See an example here. Reload the page to re-render the elements. Code follows:

<!doctype html>
<html>
	<head>
		<title>Styling Raphael.js Elements with CSS</title>
		<script type="text/javascript" src="jquery-1.7.1.min_.js"></script>
		<script type="text/javascript" src="raphael-min.js"></script>
		<script type="text/javascript">
			var r1,r2,i
			$(document).ready(function(){
				r1 = new Raphael('raph1',320,320);
				for(i=0;i<50;i++) {
					var s1 = Math.round(Math.random()*300)+10;
					var s2 = Math.round(Math.random()*300)+10;
					var e1 = Math.round(Math.random()*300)+10;
					var e2 = Math.round(Math.random()*300)+10;
					var s = Math.round(Math.random()*5);
					var c = Math.round(Math.random()*5);
					var p = "M"+s1+","+s2+"L"+e1+","+e2;
					var out = r1.path(p).attr({"stroke-width":s});
					$(out.node).attr('class','c'+c);
				}
				r2 = new Raphael('raph2',320,320);
				for(i=0;i<50;i++) {
					var x = Math.round(Math.random()*320);
					var y = Math.round(Math.random()*320);
					var r = Math.round(Math.random()*32);
					var s = Math.round(Math.random()*5);
					var c = Math.round(Math.random()*5);
					var f = Math.round(Math.random()*5);
					var out = r2.circle(x,y,r).attr({"stroke-width":s});
					$(out.node).attr('class','c'+c + ' f'+f);
				}
			});
		</script>
		<style type="text/css">
			* {margin:0;padding:0;}
			h4 {margin:20px 20px 0 20px;}
			.demo {width:320px;height:320px;margin:5px 20px 20px 20px;border:1px solid #cccccc;}
			.c0 {stroke:#ff0000;}
			.c1 {stroke:#00ff00;}
			.c2 {stroke:#0000ff;}
			.c3 {stroke:#ffff00;}
			.c4 {stroke:#ff00ff;}
			.c5 {stroke:#00ffff;}
			
			.f0 {fill:#222222;}
			.f1 {fill:#444444;}
			.f2 {fill:#666666;}
			.f3 {fill:#888888;}
			.f4 {fill:#aaaaaa;}
			.f5 {fill:#cccccc;}
		</style>
	</head>
	<body>
		<h4>Styling stroke color</h4>
		<div class="demo" id="raph1"></div>
		<h4>Styling stroke color and fill color</h4>
		<div class="demo" id="raph2"></div>
	</body>
</html>

and so forth. CSS classes and IDs work the same for SVG elements as they do for HTML elements. The big difference is that SVG styles which mimic HTML styles use different key words. Where you would set a background color on a HTML element using background-color:#cccccc, in SVG you would use fill:#cccccc. Stroke is the SVG version of border.

Here is a short list of helpful links for styling SVG with CSS:

SVG and CSS

Style reference at Mozilla Developer Network

3D Langton’s Ant, in Actionscript 3 Using Away3d

Fast on the heels of the 3D Langton’s Ants in Javascript  using Three.js, here is a version done in Actionscript 3 using Away3d. This will look better on faster computers. Click the image to launch the experiment.

Other than some additional rotation around the main axis, it is identical to the Javascript version, including a glitch that kicks in somewhere around 1200 cubes. In the Javascript version, Chrome would crash at around 700 cubes. In this version, it starts to get a little glitchy at 1600, then progressively more glitchy until it eventually stops updating the screen completely. Oddly, the script continues to run; you will be able to see the number of cubes increment in the upper left corner. I am not sure if this is a hard limit built into Away3d, or the Flash 3D API, or if there is a memory limit of some kind being reached. I suspect – based on the occasional warnings which popped up during development – that it is a hard-coded polygon limit within Away3d. There is probably some way around it, but I don’t (yet) have the know-how to go in and fix it.

Anyway, here is the code for the experiment. Comment out any lines which use the “org.eccesignum.*” files; they assume you have the code for my custom InfoPanel in your library path.

package {
	import away3d.cameras.Camera3D;
	import away3d.containers.ObjectContainer3D;
	import away3d.containers.Scene3D;
	import away3d.containers.View3D;
	import away3d.entities.Mesh;
	import away3d.lights.DirectionalLight;
	import away3d.lights.PointLight;
	import away3d.materials.ColorMaterial;
	import away3d.materials.lightpickers.*;
	import away3d.primitives.SphereGeometry;
	import away3d.primitives.CubeGeometry;
	
	import flash.display.Sprite;
	import flash.display.StageAlign;
	import flash.display.StageScaleMode;
	import flash.events.Event;
	import flash.events.MouseEvent;
	import flash.events.TimerEvent;
	import flash.geom.Vector3D;
	import flash.utils.Timer;
	
	import org.eccesignum.utilities.InfoPanel;
	
	[SWF(width=640,height=480,frameRate=32,backgroundColor=0x000000)]
	
	public class Main extends Sprite {
		internal var _info:InfoPanel;
		private var view:View3D;
		private var cubeContainer:ObjectContainer3D;
		private var scene:Scene3D;
		private var camera:Camera3D;
		private var directionalLight:DirectionalLight;
		private var lightPicker:StaticLightPicker
		private var cMaterial:ColorMaterial;
		private var antX:Number = 32,
			antY:Number = 32,
			antZ:Number = 32,
			nextX:Number,
			nextY:Number,
			nextZ:Number,
			cellsX:int = 64,
			cellsY:int = 64,
			cellsZ:int = 64,
			cellWidth:int = 8,
			cellHeight:int = 8,
			cellDepth:int = 8,
			antSize:int = 7,
			maxDirections:Number = 8,
			colorMultiplier:Number = Math.round(256/cellsX),
			xOff:Number = cellsX/2*cellWidth,
			yOff:Number = cellsY/2*cellHeight,
			zOff:Number = cellsZ/2*cellDepth,
			objects:Array,
			antDirection:Number = 1,
			filledCells:int = 0;
		
		public function Main():void {
			addEventListener(Event.ADDED_TO_STAGE,onAddedToStage);
		}
		private function onAddedToStage(e:Event):void {
			removeEventListener(Event.ADDED_TO_STAGE,onAddedToStage);
			stage.scaleMode = StageScaleMode.NO_SCALE;
			stage.align = StageAlign.TOP_LEFT;
			init();
		}
		private function init():void {
			_info = new InfoPanel(this,100,50);
			scene = new Scene3D();
			camera = new Camera3D();
			view = new View3D(null,camera);
			view.antiAlias = 2;
			camera.x = 0;
			camera.z = 150;
			camera.y = -300;
			cubeContainer = new ObjectContainer3D();
			cubeContainer.rotationY=0;
			cubeContainer.rotationZ=45;
			
			directionalLight = new DirectionalLight(0,150,-300);
			directionalLight.diffuse = 1;
			directionalLight.specular = 0.3;
			directionalLight.color=0xffffff;
			scene.addChild(directionalLight);
			lightPicker = new StaticLightPicker([directionalLight]);
			
			cMaterial = new ColorMaterial(0x999999);
			cMaterial.lightPicker  = lightPicker;
			
			scene.addChild(cubeContainer);
			camera.lookAt(new Vector3D(0,0,0));
			view.scene = scene;
			addChild(view);

			objects = new Array(cellsX);
			for(var i:int=0;i<objects.length;i++) {
				objects[i] = new Array(cellsY);
				for(var j:int=0;j<objects[i].length;j++) {
					objects[i][j] = new Array(cellsZ);
				}
			}
			view.render();
			addEventListener(Event.ENTER_FRAME,onEnterFrame);
		}
		private function onEnterFrame(e:Event):void {
			if(!objects[antX][antY][antZ]) {
				antDirection++;
				if(antDirection == maxDirections) antDirection = 0;
				addObject(antX,antY,antZ);
			} else {
				removeObject(antX,antY,antZ);
				antDirection--;
				if(antDirection == -1) antDirection = maxDirections-1;
			}
			switch(antDirection) {
				case 0:
					antZ--;
					break;
				case 1:
					antX++;
					break;
				case 2:
					antY++;
					break;
				case 3:
					antX--;
					break;
				case 4:
					antZ++;
					break;
				case 5:
					antX++;
					break;
				case 6:
					antY--;
					break;
				case 7:
					antX--;
					break;
				default:
					break;
			}
			if(antY < 0) antY += cellsY;
			if(antY >= cellsY) antY -= cellsY;
			if(antX < 0) antX += cellsX;
			if(antX >= cellsX) antX -= cellsX;
			if(antZ < 0) antZ += cellsZ;
			if(antZ >= cellsZ) antZ -= cellsZ;

			cubeContainer.rotationZ+=.5;
			cubeContainer.rotationY+=.5;
			cubeContainer.rotationX+=.5;
			_info.update(filledCells.toString(),true);
			view.render();
		}
		private function addObject(x:int,y:int,z:int):void {
			var cGeometry:CubeGeometry = new CubeGeometry();
				cGeometry.width = antSize;
				cGeometry.height = antSize;
				cGeometry.depth = antSize;
			var cMesh:Mesh = new Mesh(cGeometry,cMaterial);
				cMesh.x = x*cellWidth-xOff;
				cMesh.y = y*cellHeight-yOff;
				cMesh.z = z*cellDepth-zOff;
			cubeContainer.addChild(cMesh);
			objects[x][y][z] = cMesh;
			filledCells++;
		}
		private function removeObject(x:int,y:int,z:int):void {
			cubeContainer.removeChild(objects[x][y][z]);
			objects[x][y][z].material.dispose();
			objects[x][y][z].dispose();
			objects[x][y][z] = null;
			filledCells--;
		}
		private function getRGB(r:int,g:int,b:int):int {
			var rgb:int = parseInt((r*colorMultiplier).toString(16) + (g*colorMultiplier).toString(16) + (b*colorMultiplier).toString(16),16);
			return rgb;
		}
			
	}
}

Feel free to use and modify the code to your heart’s content. If you come up with anything nifty, post a link to it in the comments.

Making Tinyscrollbar.js Easier to Implement

On a recent project I had the opportunity to play around with the TinyScrollbar.js jQuery plugin, which is used to add custom scrollbars to blocks of content. The project had to play nice with both standard browsers and mobile versions, and there was a lot of modular content, so it was either have some scrolling or a lot of little pages. We went with scrolling.

Using TinyScrollbar.js is fairly simple – find the block of content to which you want to add the scrollbars, add some HTML, and make a function call. The one down side is that the extra HTML needs to be added by hand. I think that is inefficient, and contrary to the idea of separating style and content. So, I played around a little and came up with a simple function, using jQuery, to do all of the wrapping for me.

The usage is simple enough: Feed in the jQuery selector string for the element to which you wish to add scroll bars. If they are to be customized, also feed in a Javascript object containing key:value pairs, which will be fed into the method call for Tinyscrollbar.

Code follows:

<!doctype html>
<html>
	<head>
		<title>TinyScrollBar test</title>
		<script type="text/javascript" src="jquery-1.7.1.min.js"></script>
		<script type="text/javascript" src="jquery.tinyscrollbar.min.js"></script>
		<script type="text/javascript">
			$(document).ready(function(){
				scrollify('#scrollbar1');
				scrollify('#scrollbar2',{sizethumb:15});
			});
			
			function scrollify(element,options) {	//	'#element', {list:of,key:values}
				$(element).children().wrapAll('<div class="viewport"><div class="overview"></div></div>');
				$(element).prepend('<div class="scrollbar"><div class="track"><div class="thumb"><div class="end"></div></div></div></div>');
				$(element).tinyscrollbar(options);
			}
		</script>
		<style type="text/css">
			* {margin:0;padding:0;}
			.scrollBox { width: 520px; clear: both; margin: 20px auto; }
			.scrollBox .viewport { width: 500px; height: 200px; overflow: hidden; position: relative; }
			.scrollBox .overview { list-style: none; position: absolute; left: 0; top: 0; }
			.scrollBox .thumb .end,.scrollBox .thumb { background-color: #00ff00; }
			.scrollBox .scrollbar { position: relative; float: right; width: 15px; border-radius:15px;}
			.scrollBox .track { 
				background-color: #D8EEFD; 
				height: 100%; 
				width:13px; 
				position: relative; 
				padding: 0 1px; 
				border-radius:15px;
				-webkit-box-shadow: inset 0px 0px 5px 5px #ededed;
				-moz-box-shadow: inset 0px 0px 5px 5px #ededed;
				box-shadow: inset 0px 0px 5px 5px #ededed;
				}
			.scrollBox .thumb {
				height: 20px; 
				width: 13px; 
				cursor: pointer; 
				overflow: hidden; 
				position: absolute; 
				top: 0; 
				border-radius:15px;
				-webkit-box-shadow: inset 0px 0px 5px 5px #333333;
				-moz-box-shadow: inset 0px 0px 5px 5px #333333;
				box-shadow: inset 0px 0px 5px 5px #333333;
				}
			.scrollBox .thumb .end {
				overflow: hidden; 
				height: 15px; 
				width: 13px; 
				border-radius:15px;
				position:absolute;left:0;top:0;
				-webkit-box-shadow: inset 0px 0px 5px 5px #333333;
				-moz-box-shadow: inset 0px 0px 5px 5px #333333;
				box-shadow: inset 0px 0px 5px 5px #333333;
				clip:rect(0px,13px,5px,0px);
				}
			.scrollBox .disable{ display: none; }

			.scrollBox p {
				
			}
			
		</style>
	</head>
	<body>
		<div id="scrollbar1" class="scrollBox">
			<p>Lorem ipsum dolor sit amet, consectetur adipiscing elit. Praesent eget est eget lacus imperdiet ultrices. Vestibulum dictum vehicula eros, nec lobortis lorem gravida sit amet. Fusce sodales ligula a tellus tristique dictum. Phasellus at tellus odio, nec interdum arcu. Cras nec felis nec velit venenatis tempus. Morbi ornare enim sit amet nisl ultrices ac pharetra justo facilisis. Nullam suscipit, sem quis imperdiet sollicitudin, eros ligula tincidunt massa, id egestas ante nulla ut nunc. Aliquam id justo ante, in viverra nibh. Pellentesque habitant morbi tristique senectus et netus et malesuada fames ac turpis egestas. Pellentesque habitant morbi tristique senectus et netus et malesuada fames ac turpis egestas. Nam in sem nunc, at tempus urna. In tristique scelerisque dui quis faucibus. Fusce hendrerit lacinia augue vel bibendum.</p>
			<p>Lorem ipsum dolor sit amet, consectetur adipiscing elit. Praesent eget est eget lacus imperdiet ultrices. Vestibulum dictum vehicula eros, nec lobortis lorem gravida sit amet. Fusce sodales ligula a tellus tristique dictum. Phasellus at tellus odio, nec interdum arcu. Cras nec felis nec velit venenatis tempus. Morbi ornare enim sit amet nisl ultrices ac pharetra justo facilisis. Nullam suscipit, sem quis imperdiet sollicitudin, eros ligula tincidunt massa, id egestas ante nulla ut nunc. Aliquam id justo ante, in viverra nibh. Pellentesque habitant morbi tristique senectus et netus et malesuada fames ac turpis egestas. Pellentesque habitant morbi tristique senectus et netus et malesuada fames ac turpis egestas. Nam in sem nunc, at tempus urna. In tristique scelerisque dui quis faucibus. Fusce hendrerit lacinia augue vel bibendum.</p>
			<p>Lorem ipsum dolor sit amet, consectetur adipiscing elit. Praesent eget est eget lacus imperdiet ultrices. Vestibulum dictum vehicula eros, nec lobortis lorem gravida sit amet. Fusce sodales ligula a tellus tristique dictum. Phasellus at tellus odio, nec interdum arcu. Cras nec felis nec velit venenatis tempus. Morbi ornare enim sit amet nisl ultrices ac pharetra justo facilisis. Nullam suscipit, sem quis imperdiet sollicitudin, eros ligula tincidunt massa, id egestas ante nulla ut nunc. Aliquam id justo ante, in viverra nibh. Pellentesque habitant morbi tristique senectus et netus et malesuada fames ac turpis egestas. Pellentesque habitant morbi tristique senectus et netus et malesuada fames ac turpis egestas. Nam in sem nunc, at tempus urna. In tristique scelerisque dui quis faucibus. Fusce hendrerit lacinia augue vel bibendum.</p>
			<p>Lorem ipsum dolor sit amet, consectetur adipiscing elit. Praesent eget est eget lacus imperdiet ultrices. Vestibulum dictum vehicula eros, nec lobortis lorem gravida sit amet. Fusce sodales ligula a tellus tristique dictum. Phasellus at tellus odio, nec interdum arcu. Cras nec felis nec velit venenatis tempus. Morbi ornare enim sit amet nisl ultrices ac pharetra justo facilisis. Nullam suscipit, sem quis imperdiet sollicitudin, eros ligula tincidunt massa, id egestas ante nulla ut nunc. Aliquam id justo ante, in viverra nibh. Pellentesque habitant morbi tristique senectus et netus et malesuada fames ac turpis egestas. Pellentesque habitant morbi tristique senectus et netus et malesuada fames ac turpis egestas. Nam in sem nunc, at tempus urna. In tristique scelerisque dui quis faucibus. Fusce hendrerit lacinia augue vel bibendum.</p>
		</div>
		
		<div id="scrollbar2" class="scrollBox">
			<p>Lorem ipsum dolor sit amet, consectetur adipiscing elit. Praesent eget est eget lacus imperdiet ultrices. Vestibulum dictum vehicula eros, nec lobortis lorem gravida sit amet. Fusce sodales ligula a tellus tristique dictum. Phasellus at tellus odio, nec interdum arcu. Cras nec felis nec velit venenatis tempus. Morbi ornare enim sit amet nisl ultrices ac pharetra justo facilisis. Nullam suscipit, sem quis imperdiet sollicitudin, eros ligula tincidunt massa, id egestas ante nulla ut nunc. Aliquam id justo ante, in viverra nibh. Pellentesque habitant morbi tristique senectus et netus et malesuada fames ac turpis egestas. Pellentesque habitant morbi tristique senectus et netus et malesuada fames ac turpis egestas. Nam in sem nunc, at tempus urna. In tristique scelerisque dui quis faucibus. Fusce hendrerit lacinia augue vel bibendum.</p>
			<p>Lorem ipsum dolor sit amet, consectetur adipiscing elit. Praesent eget est eget lacus imperdiet ultrices. Vestibulum dictum vehicula eros, nec lobortis lorem gravida sit amet. Fusce sodales ligula a tellus tristique dictum. Phasellus at tellus odio, nec interdum arcu. Cras nec felis nec velit venenatis tempus. Morbi ornare enim sit amet nisl ultrices ac pharetra justo facilisis. Nullam suscipit, sem quis imperdiet sollicitudin, eros ligula tincidunt massa, id egestas ante nulla ut nunc. Aliquam id justo ante, in viverra nibh. Pellentesque habitant morbi tristique senectus et netus et malesuada fames ac turpis egestas. Pellentesque habitant morbi tristique senectus et netus et malesuada fames ac turpis egestas. Nam in sem nunc, at tempus urna. In tristique scelerisque dui quis faucibus. Fusce hendrerit lacinia augue vel bibendum.</p>
			<p>Lorem ipsum dolor sit amet, consectetur adipiscing elit. Praesent eget est eget lacus imperdiet ultrices. Vestibulum dictum vehicula eros, nec lobortis lorem gravida sit amet. Fusce sodales ligula a tellus tristique dictum. Phasellus at tellus odio, nec interdum arcu. Cras nec felis nec velit venenatis tempus. Morbi ornare enim sit amet nisl ultrices ac pharetra justo facilisis. Nullam suscipit, sem quis imperdiet sollicitudin, eros ligula tincidunt massa, id egestas ante nulla ut nunc. Aliquam id justo ante, in viverra nibh. Pellentesque habitant morbi tristique senectus et netus et malesuada fames ac turpis egestas. Pellentesque habitant morbi tristique senectus et netus et malesuada fames ac turpis egestas. Nam in sem nunc, at tempus urna. In tristique scelerisque dui quis faucibus. Fusce hendrerit lacinia augue vel bibendum.</p>
			<p>Lorem ipsum dolor sit amet, consectetur adipiscing elit. Praesent eget est eget lacus imperdiet ultrices. Vestibulum dictum vehicula eros, nec lobortis lorem gravida sit amet. Fusce sodales ligula a tellus tristique dictum. Phasellus at tellus odio, nec interdum arcu. Cras nec felis nec velit venenatis tempus. Morbi ornare enim sit amet nisl ultrices ac pharetra justo facilisis. Nullam suscipit, sem quis imperdiet sollicitudin, eros ligula tincidunt massa, id egestas ante nulla ut nunc. Aliquam id justo ante, in viverra nibh. Pellentesque habitant morbi tristique senectus et netus et malesuada fames ac turpis egestas. Pellentesque habitant morbi tristique senectus et netus et malesuada fames ac turpis egestas. Nam in sem nunc, at tempus urna. In tristique scelerisque dui quis faucibus. Fusce hendrerit lacinia augue vel bibendum.</p>
		</div>
	</body>
</html>

And that’s all there is to it. Fairly straight forward, and works across all major browsers. Click here to see this example in action.

Great Horned Owl

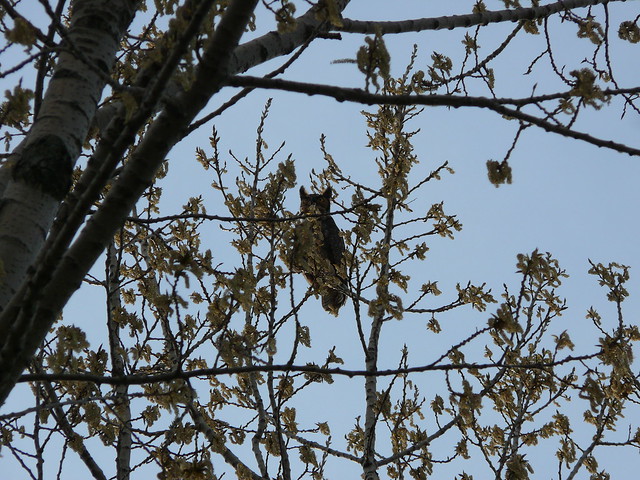
Great Horned Owl

This is a Great Horned Owl which was chased into my yard by a red-tail hawk. It stayed in a freshly-budded cottonwood tree from late afternoon until after dark.

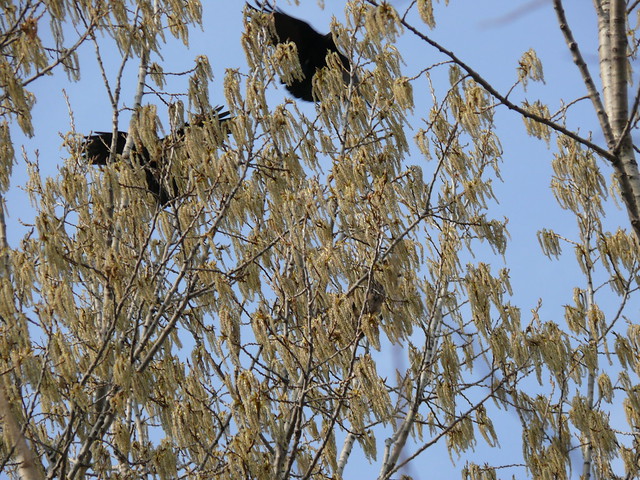
Great Horned Owl and Crows

Two crows periodically stopped by to harrass the owl, but it did little other than to flinch and hiss at its tormenters. I think it might have been injured by the hawk, but there was no evidence that I could see, other than its unwillingness to leave the tree until after dark.

Click either of the photos to see the rest in the set over at Flickr. Over on YouTube I also have a couple of videos of the crows and the owl. Video 1. Video 2.

Langton’s Ant in 3d, Using Javascript and Three.js

Langton's Ant in 3d, using Javascript and Three.js

Click the screenshot to launch the demo. You will need to use the latest version of Chrome, Firefox or Safari if you want to see it running.

This is a re-creation of a Flash experiment from several years ago. Back before I started playing around with 3d, I created a series of experiments exploring cellular automata, the majority of which were variations on the Langton’s Ant algorithm. The most advanced version was one in pseudo-3d, and that was the last for over three years. Now with the advent of easy-to-use 3d libraries (like Three.js, used here), and the option of hardware acceleration to allow for complex animations, I felt it was time to re-visit some of the old experiments.

Here is the source code for the 3d ant:

window.requestAnimFrame = (function(){
	return  window.requestAnimationFrame	|| 
		window.webkitRequestAnimationFrame || 
		window.mozRequestAnimationFrame    || 
		window.oRequestAnimationFrame      || 
		window.msRequestAnimationFrame     || 
		function( callback ){
			window.setTimeout(callback, 1000 / 60);
		};
})();

var canvas,
	stage,
	container,
	scene,
	camera,
	renderer,
	projector,
	light;
	
var WIDTH = 640,
	HEIGHT = 640;
	VIEW_ANGLE = 45,
	ASPECT = WIDTH/HEIGHT,
	NEAR = .1,
	FAR = 10000,
	centerX = 0,
	centerY = 0,
	centerZ = 0,
	cameraX = 0,
	cameraY = 200,
	cameraZ = 400;
	
var antX = 32,
	antY = 32,
	antZ = 32,
	nextX,
	nextY,
	nextZ,
	cellsX = 64,
	cellsY = 64,
	cellsZ = 64,
	cellWidth = 8,
	cellHeight = 8,
	cellDepth = 8,
	antSize = 7,
	maxDirections = 8,
	colorMultiplier = Math.round(256/cellsX),
	xOff = cellsX/2*cellWidth,
	yOff = cellsY/2*cellHeight,
	zOff = cellsZ/2*cellDepth,
	base,
	objects,
	antDirection = 1,
	filledCells=0,
	
	isRotating=true,
	isPaused=false;
	
	function init() {
		canvas = document.getElementById("myCanvas");
		scene = new THREE.Scene();
		camera = new THREE.PerspectiveCamera( VIEW_ANGLE, ASPECT, NEAR, FAR );
		camera.position.x = cameraX;
		camera.position.y = cameraY;
		camera.position.z = cameraZ;
		camera.lookAt(scene.position);
		scene.add( camera );
		projector = new THREE.Projector();
		renderer = new THREE.WebGLRenderer( { antialias: true } );
		renderer.setSize( WIDTH, HEIGHT );
		light = new THREE.SpotLight();
		light.position.set( cameraX, cameraY, cameraZ );
		scene.add(light);
		canvas.appendChild( renderer.domElement );
		renderer.render(scene,camera);
		
		base = new THREE.Object3D();
		base.position.x = centerX;
		base.position.y = centerY;
		base.position.x = centerZ;
		base.rotation.y = 45;
		scene.add(base);
		camera.lookAt(base.position);
		objects = new Array(cellsX);
		for(var i=0;i<objects.length;i++) {
			objects[i] = new Array(cellsY);
			for(var j=0;j<objects[i].length;j++) {
				objects[i][j] = new Array(cellsZ);
			}
		}
		onEnterFrame();
	}
	
	function onEnterFrame() {
		requestAnimFrame(onEnterFrame);
		renderer.render(scene,camera);
		if(isPaused==true) return;
		if(!objects[antX][antY][antZ]) {
			antDirection++;
			if(antDirection == maxDirections) antDirection = 0;
			addObject(antX,antY,antZ);
		} else {
			removeObject(antX,antY,antZ);
			antDirection--;
			if(antDirection == -1) antDirection = maxDirections-1;
		}
		switch(antDirection) {
			case 0:
				antZ--;
				break;
			case 1:
				antX++;
				break;
			case 2:
				antY++;
				break;
			case 3:
				antX--;
				break;
			case 4:
				antZ++;
				break;
			case 5:
				antX++;
				break;
			case 6:
				antY--;
				break;
			case 7:
				antX--;
				break;
			default:
				break;
		}
		if(antY < 0) antY += cellsY;
		if(antY >= cellsY) antY -= cellsY;
		if(antX < 0) antX += cellsX;
		if(antX >= cellsX) antX -= cellsX;
		if(antZ < 0) antZ += cellsZ;
		if(antZ >= cellsZ) antZ -= cellsZ;
		if(isRotating==true) base.rotation.y +=.01;
		document.getElementById("count").value = filledCells;
	}
	function addObject(x,y,z) {
		var sphereMaterial = new THREE.MeshPhongMaterial({
			color: getRGB(x,y,z),
			opacity:1
		});	
		var obj = new THREE.Mesh(
		   new THREE.CubeGeometry(antSize,antSize,antSize),
		   sphereMaterial);
		obj.position.x = x*cellWidth-xOff;
		obj.position.y = y*cellHeight-yOff;
		obj.position.z = z*cellDepth-zOff;
		obj.overdraw = true;
		base.add(obj);
		objects[x][y][z] = obj;
		filledCells++;
	}
	function removeObject(x,y,z) {
		base.remove(objects[x][y][z]);
		objects[x][y][z] = null;
		filledCells--;
	}
	function getRGB(r,g,b) {
		var rgb = parseInt((r*colorMultiplier).toString(16) + (g*colorMultiplier).toString(16) + (b*colorMultiplier).toString(16),16);
		return rgb;
	}
	onload=init;

The above code assumes you have downloaded a copy of Three.js and have a HTML page with appropriate elements set up. To see the entirety of the code I used, right-click on the screenshot and open it in a new tab or window, then view source. It’s all one file, other than the Three.js library. Feel free to copy it in its entirety and play around.